Skip to content
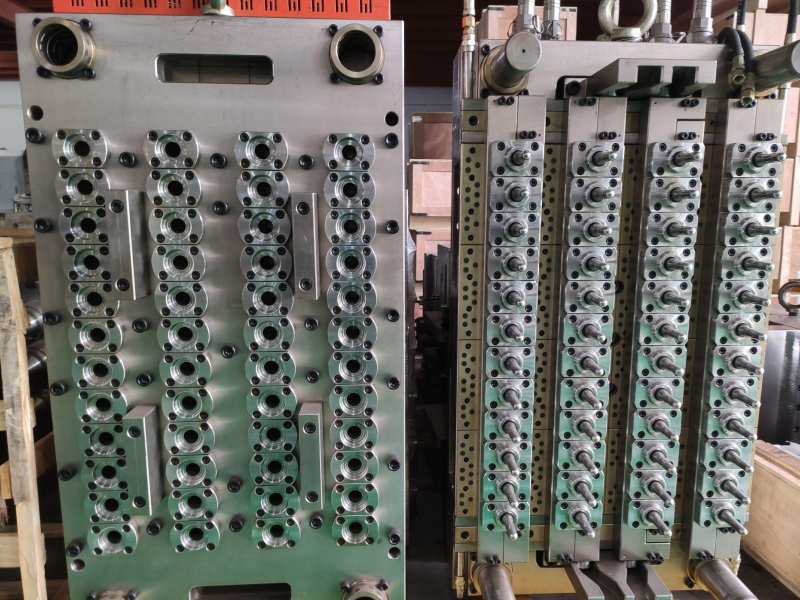
If your bottles often face leaks, cracks, or weak caps, the problem usually starts with the preform. A PET preform is simply the bottle’s unfinished stage—its strength and clarity are locked in here. In this guide, we’ll cover everything from the machines used in production, to the drying, molding, cooling, and inspection steps, as well as the certifications, performance standards, and even new trends like lightweight designs and rPET adoption. With this full guide, you’ll know how to judge quality and choose the right supplier with confidence.
What Equipment Is Required for PET Preform Production?
In modern pet preform production, several machines must operate in precise sequence to maintain stability and efficiency. Below is the equipment list, already arranged step by step along the production process for you to browse directly:
- Dehumidifying dryer – removes moisture from PET pellets before processing.
- Feeding system – vacuum loader or automatic conveyor that moves dried pellets into the machine.
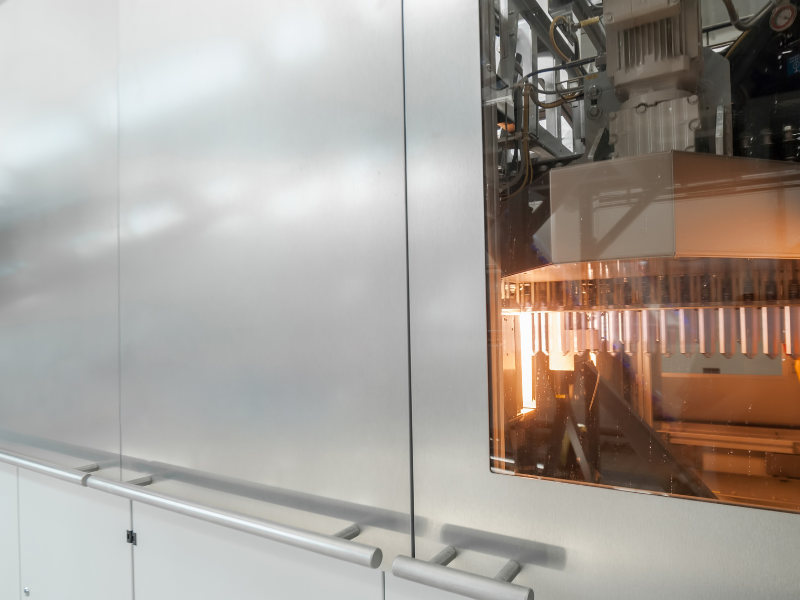
- Injection molding machine – the core unit that melts PET resin and injects it into the mold.
- Preform molds – precision molds with multiple cavities that shape the preforms.
- Chillers and temperature control units (TCUs) – keep mold temperature stable for consistent cooling.
- Air compressor – provides the pressurized air needed for smooth machine operation.
- Mixers and blenders – used when colorants or additives are mixed with PET resin.
- Crushers and regrind systems – recycle rejected or trimmed preforms back into usable flakes.
Together, these machines form a complete line that takes raw PET pellets through drying, melting, molding, and cooling, all the way to finished preforms ready for inspection.
How Are PET Preforms Made? A Step-by-Step Process
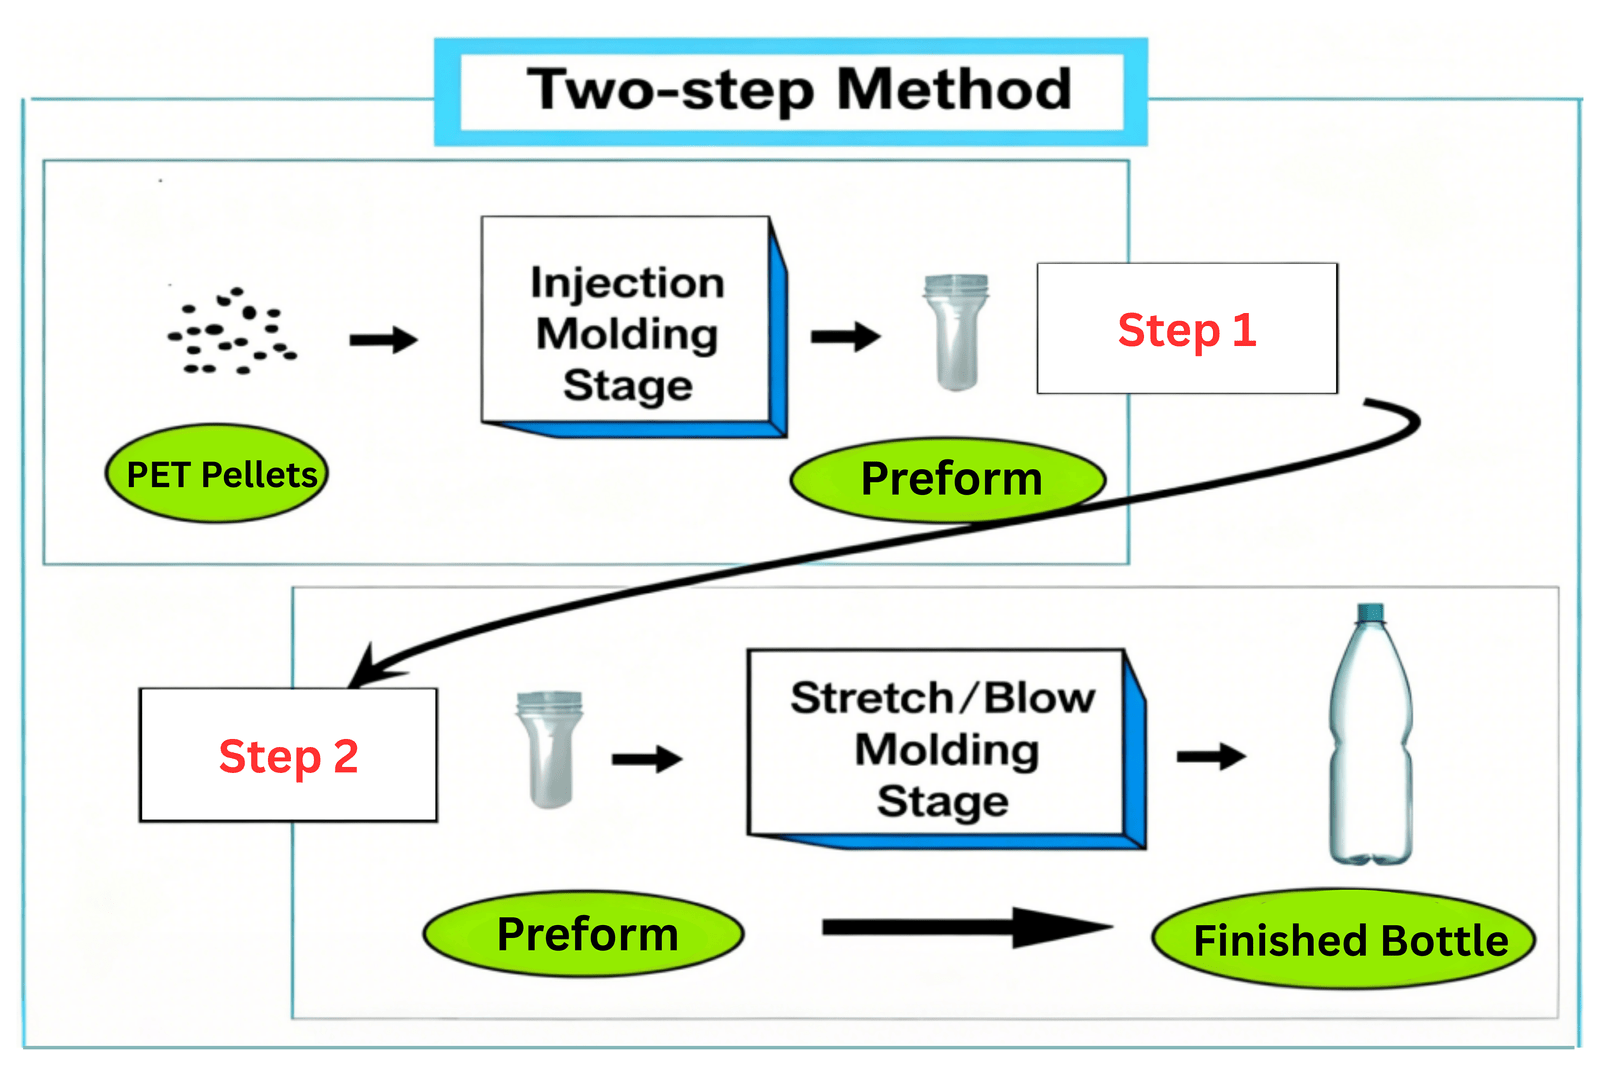
Before any plastic bottle takes shape, it first exists as a PET preform—an essential stage that cannot be skipped. Preforms ensure every bottle meets strict standards of strength, clarity, and consistency. Since we’ve already looked at the main equipment needed for production, let’s now walk through each step from raw resin to finished preform.Please note, this section focuses on the two-stage method of preform molding.
Step 1 – PET Resin Drying and Preparation
For anyone curious about how to make pet preform correctly, the process always begins with resin preparation. The foundation of every PET preform lies in bottle-grade PET resin (polyethylene terephthalate). To ensure consistent quality, responsible factories source FDA-compliant white or transparent pellets, typically 2–4 mm in size, with impurities kept below 0.1% and must controlled acetaldehyde levels—standards that are essential for food safety and certification.
Since PET resin absorbs moisture during transport (around 0.2–0.5%), it should not be unloaded directly into storage. A better practice is to follow these steps:
First, pellets are moved by a vacuum system straight from the truck into dehumidifying dryers, where air is dried to a –40 °C dew point and heated to 160–180 °C. Passing through the resin bed for 4–6 hours, this process reduces moisture to ≤0.02%. Skipping or rushing it risks cloudiness and weak preforms.
Once dried, the PET pellets are fed through a hopper into the extruder’s screw barrel, where controlled heating and screw rotation turn them into a uniform melt. The barrel is divided into three heating zones (about 240–285 °C), allowing the resin to soften gradually before fully melting. We recommend keeping screw speed stable at 30–50 rpm to ensure consistency, while a melt filter at the outlet removes fine dust or fragments to protect the injection mold from blockages and defects.
Step 2 – Injection Molding of PET Preforms
In PET preform molding, the extruder and injection machine actually work as one combined system. As mentioned earlier, PET pellets are melted in the extruder, and this melt then flows directly into the injection barrel through an insulated pipeline, without any manual handling. The pipeline is usually kept at 270–285 °C, and its smooth inner surface helps prevent sticking while keeping the melt stable and easy to process.
To keep the melt flow precise, many PET preform plants install a melt pump on the pipeline as a flow regulator, working alongside the injection machine. For example, if the extruder makes 100 g of melt per minute, the pump ensures that the same amount enters the injection barrel in a steady flow. This balance is important because it:
- Prevents excess melt from sitting too long in the barrel and overheating or burning.
- Avoids shortages that could stop the molding process midway.
So, in short, the extruder makes the melt, the pipeline carries it, and the pump keeps the amount consistent.
Once the melt enters the injection barrel, the screw begins to rotate slowly and steadily. This motion not only mixes the melt to reduce uneven spots and small temperature differences, but also pushes it forward into the metering chamber. You can think of this chamber as a measuring cup: it stores just the right amount needed for each shot—about 20 g for a single-cavity mold or 100 g for a five-cavity mold. When the chamber is filled, the screw stops rotating and then moves forward, injecting the measured melt into the mold cavities under controlled pressure.
To keep this injection process stable and consistent, our 20+ years of production practice highlight two simple but important steps. First, always clean the pipeline before starting a new run to avoid color variation in the preforms. Second, make sure the pipeline, extruder, and barrel temperatures stay aligned, because even a small difference of 5 °C can change melt viscosity and cause defects such as uneven walls or incomplete shapes.
Step 3 – Cooling and Solidification
The cooling stage is just as important as molding itself, because it decides whether a preform keeps its proper shape or ends up with dents and stress marks. Here’s how it usually works:
1. Packing and Initial Cooling
When the PET melt fills the mold cavity, the machine doesn’t release pressure right away. Instead, it keeps pressing for about 10–15 seconds—like holding down the lid on a thermos—to make up for shrinkage as the hot plastic cools. At the same time, cold water at 20–25 °C runs through tiny channels inside the mold, quickly pulling heat away. This forms a thin, solid “shell” on the outside while the inside is still soft.
2. Full Cooling and Shaping
Next, the mold temperature control unit (TCU) adjusts the water temperature step by step so the preform cools evenly. At first, slightly warmer water (22–25 °C) slows the surface cooling, preventing cracks. Then cooler water (20–22 °C) speeds up heat removal so the inside also hardens. Finally, holding at about 20 °C brings the whole preform down to a stable 50–60 °C. This usually takes 20–30 seconds, depending on thickness—thicker preforms may need closer to 30 seconds, while thinner ones solidify faster.
3. Demolding and Secondary Cooling
Once the preform surface drops to 50–60 °C, the mold opens and ejects it safely without marks or cracks. Right after that, the preforms move onto a cooling conveyor with fans blowing room-temperature air (about 25 °C) for another 2–3 minutes. This step relieves internal stress and prevents the preform from warping during storage.From years of practice, we’ve learned one more key point: keep mold water flow steady at 5–8 L/min. Too little flow slows cooling and lowers efficiency, but too much can waste energy and even make the surface look dull.
Step 4 – Quality Control and Inspection
After demolding and secondary cooling, a preform isn’t “done” yet. Quality checks here catch issues early and protect downstream blowing and capping performance.
1) Visual & Dimensional Checks
First, each preform goes through a visual scan plus manual gauging. We look for neck flashing, bubbles, and color streaks. Then we measure: neck diameter within ±0.1 mm, body height within ±0.2 mm, and uniform wall thickness at the shoulder and base. These limits keep caps leak-tight and blowing results consistent.
2) Physical Testing (Sampling)
Next, we pull 5–10 samples from every 1,000 preforms. A tensile test confirms strength (target ≥50 MPa). A sealing test adds pressurized water at the neck to check for leaks. If anything fails, the batch is isolated and the process settings (drying, injection, cooling) are adjusted before release.
3) Closure Fatigue Check
Finally, we tighten a matching cap to normal torque and run 50–100 open/close cycles. After the test, the cap should still seal with no drips, and the neck threads should show no meaningful wear or deformation. This proves the preform will survive filling lines, transport, and consumer use.
Manufacturer tips to prevent repeats
- Calibrate gauges on schedule; record results (SPC) and set stop-limits.
- Trace each box by cavity ID and date code for fast root-cause checks.
- When trends drift, adjust drying, melt temperature, pack/hold time, or mold cooling before defects appear.
One-Stage vs. Two-Stage PET Preform Process
The pet bottle preform manufacturing process can follow one of two main routes: the one-stage or two-stage method. What we just covered is the two-stage method, where the process stops once the preforms are made and inspected. In the one-stage method, the preform steps are the same, but instead of storing them, the preforms are blown into bottles right away. This setup is common for smaller batches or special bottle designs, while the two-stage method is better suited for large-scale production.
What Quality Standards Must a PET Preform Meet?
When it comes to PET preforms, the core principle is simple: different uses call for different standards. A water bottle must be safe and tasteless, while a detergent bottle must resist stress and impact. To make it clearer, let’s look at two groups of requirements—certifications and technical compliance.
1) Mandatory Certifications
| Certification | What It Ensures | Typical Application |
|---|---|---|
| FDA (21 CFR) | Food-contact safety for U.S. market | Bottled water, juices |
| EU 10/2011 | Compliance with EU plastic food-contact regulation | Juices, dairy |
| GB 4806 | Chinese national food-contact safety | Beverages in China |
| ISO 22000 / HACCP | Food safety management during production | Beverage packaging |
| ISO 9001 | Quality management system | All PET preform factories |
| SGS Migration Test | No harmful substance migration | Food and pharma bottles |
| REACH | No restricted chemicals (EU) | Export to Europe |
| RoHS | Restriction of hazardous substances | Electronics-related bottles |
| Kosher/Halal | Religious compliance for ingredients and processing | Special beverage markets |
| BPA Free Declaration | No Bisphenol-A used | All food-grade preforms |
| DEHP Free | No harmful plasticizers | Baby products, pharma bottles |
If you already know which certifications you must have, the next step is to check the production requirements that every reliable preform should meet. These cover dimensional accuracy, filling performance, and mechanical strength during real use.
2) Technical & Performance Compliance
| Requirement | Pass Criteria | Typical Application |
|---|---|---|
| Hot-fill performance | Withstands 85–95 °C filling without shrink or cap leaks | Juice, tea |
| Cold-fill performance | Stable clarity and toughness at 0–5 °C | Dairy, chilled drinks |
| Dimensional accuracy | Weight ± 0.2 g; neck ± 0.1 mm; wall thickness ± 0.1 mm | All bottles |
| Intrinsic Viscosity (IV) | Beverage-grade IV: 0.78–0.84 dl/g | Food and drink bottles |
| CO₂ & pressure resistance | Meets carbonation and top-load specs | CSD bottles |
| Mechanical strength | Tensile ≥ 50 MPa; drop impact passes | Home-care, large containers |
| Optical clarity | No bubbles, haze, streaks, or black spots | Clear PET bottles |
| Cap & thread fit | Finish per spec (PCO 1881, 30/25, etc.); leak test passed | Beverage, edible oil |
| Cooling & stress release | No internal stress cracks after storage | All bottles |
| Traceability | Cavity ID + lot/date code on each box | All preform batches |
Why Choose a Manufacturer You Can Trust for PET Preforms
So, making a PET preform is simply the process of going from resin drying, to injection molding, to cooling, and finally to quality inspection. Today’s preforms are no longer the heavy, outdated products of the past. Instead, factories worldwide are moving toward lightweight, thin-wall designs, while sustainability and the use of recycled PET (rPET) are becoming global priorities.
That’s exactly where Enlightening Plast stands ready for you. We use 100% recyclable, virgin PET resin, and every step of our two-stage molding process follows strict standards with low tolerances and high blowing rates. Backed by over 20 years of proven expertise and certifications such as TÜV, FDA, and ISO 9001, we deliver preforms that meet both global compliance and your market needs.
👉 Take the next step today: contact our team, request samples, and see why so many leading brands choose Enlightening Plast as their trusted PET preform manufacturer and long-term supply partner.